Step-by-Step Installation of Halo Smart Sensor
We are always looking for innovative ways to improve safety and efficiency in the built environment. One of the best solutions we recommend to our clients is the Halo Smart Sensor. This device not only enhances building safety with its advanced monitoring capabilities, but it also provides real-time alerts for air quality, temperature, motion, and even the presence of smoke or carbon monoxide.
If you’re considering upgrading your building’s safety system with the Halo Smart Sensor, you’re in the right place. In this article, we’ll walk you through the step-by-step process of installing this smart sensor and explain how it integrates seamlessly into your property.
1. Preparation for Installation
Before we start the installation process, proper preparation is essential. We always make sure we have everything ready to ensure the installation is efficient and effective. Here’s what you’ll need to get started:
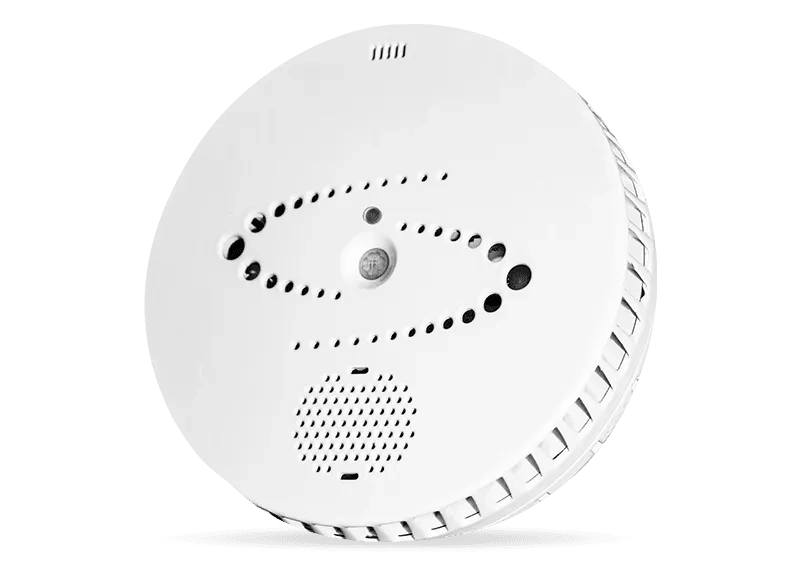
- Halo Smart Sensor unit: Ensure you have all the parts that come with the sensor, including mounting hardware.
- Power source: The Halo Smart Sensor requires a stable power source, which can either be a battery or a direct electrical connection, depending on the model.
- Smartphone or tablet: You will need the Halo mobile app to configure and control the sensor.
- Tools: A screwdriver, level, and drill for mounting are typically needed.
- Location: Choosing the right location is key to effective sensor performance. Ideally, the sensor should be placed in an open area where it can detect air quality and movement without obstructions.
2. Choosing the Ideal Location
Selecting the right location for the Halo Smart Sensor is crucial. The sensor works best when installed in high-traffic areas where monitoring air quality and detecting environmental hazards can provide the most benefit. Here are some tips from Milidaro when deciding on the best spot:
- Central Location: Position the sensor centrally in the room for maximum coverage.
- Height: Mount the sensor at least 5 to 6 feet off the ground to accurately measure air quality and detect potential hazards.
- Avoid Obstructions: Avoid placing the sensor near walls, vents, or windows as these can affect the accuracy of readings.
- Near Power Sources: If you’re hardwiring the sensor, make sure it’s near a reliable power source.
3. Mounting the Sensor
Once you’ve identified the right location, it’s time to mount the Halo Smart Sensor. Here’s how we typically approach the mounting process at Milidaro:
- Prepare the Surface: Before attaching the mounting bracket, make sure the surface is clean and dry.
- Attach the Mounting Bracket: Use the screws provided with the unit to secure the mounting bracket to the wall or ceiling. Make sure it’s level using a level tool to ensure proper sensor orientation.
- Attach the Sensor Unit: After the bracket is in place, attach the Halo Smart Sensor to the bracket. Depending on the model, this may involve clicking the unit into place or securing it with additional screws.
4. Powering the Device
The Halo Smart Sensor can be powered either through batteries or a direct electrical connection. Here’s how you can go about powering the device:
- Battery-Powered Model: If you’re using the battery-powered model, insert the batteries into the sensor. Follow the manufacturer’s instructions to ensure the batteries are installed correctly.
- Wired Model: For a wired setup, connect the sensor to your building’s electrical system. This may require a professional electrician, especially if you need to run wires through walls or ceilings. Milidaro always ensures a secure and safe connection when installing these systems.
After the power is connected, you should see the Halo Smart Sensor’s light indicator flash, showing that it’s powered on and ready to go.
5. Connecting the Sensor to Your Wi-Fi Network
The Halo Smart Sensor requires a Wi-Fi connection to function effectively. This is how you can connect the device to your network:
- Download the App: The first step is to download the Halo app on your smartphone or tablet. This app is available on both iOS and Android devices.
- Create an Account: If you don’t already have an account, create one on the app. This will allow you to monitor and control the sensor from anywhere.
- Connect to Wi-Fi: Open the app, follow the on-screen instructions, and connect the Halo Smart Sensor to your Wi-Fi network. Make sure you have a stable and secure Wi-Fi connection, as the sensor will be sending real-time updates.
- Configure Settings: Once the sensor is connected, you’ll be prompted to configure the settings according to your preferences. You can adjust alerts, set thresholds for air quality, and link the sensor with other smart devices on your property.
6. Testing the Sensor
We believe in making sure everything is working perfectly before finalizing the installation. After connecting the Halo Smart Sensor to the Wi-Fi network, it’s time to test the device to ensure it’s functioning as expected:
- Check the App: Verify that the sensor is communicating with the app by viewing its live data. You should be able to see real-time readings for air quality, motion detection, and environmental hazards.
- Trigger Alerts: Test the sensor’s alert functionality by mimicking smoke or gas emissions. This will ensure the sensor sends notifications to your phone or other connected devices.
- Adjust Sensitivity: Based on your environment, adjust the sensitivity settings in the app. You may want to tweak the sensor’s sensitivity for things like carbon monoxide detection or smoke alarm thresholds.
7. Maintenance and Upkeep
To ensure the Halo Smart Sensor operates effectively, regular maintenance is required. Here are some ongoing steps from Milidaro for keeping your sensor in top condition:
- Battery Replacement: If you’re using the battery-powered model, replace the batteries as needed (usually once every 6-12 months).
- Clean the Sensor: Dust and debris can accumulate on the sensor over time, potentially impacting its performance. Use a soft cloth to wipe the unit clean, avoiding any abrasive materials that could scratch it.
- Check Wi-Fi Connection: Periodically check the Wi-Fi connection to ensure it’s stable. If you experience any connectivity issues, reboot the router or check for updates to the app or sensor firmware.
8. Integrating with Other Smart Systems
For those who have a fully integrated smart building system, the Halo Smart Sensor can be connected to other devices such as lighting, HVAC, or security systems. Here’s how Milidaro approaches smart system integration:
- Smart Home Hub: If you have a smart home hub like Amazon Alexa or Google Home, you can integrate the Halo Smart Sensor into that system for voice control and automation.
- Automated Actions: Set up triggers so that when the Halo Smart Sensor detects smoke, for example, it can automatically shut off the HVAC system or turn on emergency lights.
- Centralized Monitoring: For larger buildings or properties, integrate multiple sensors into a centralized monitoring system, providing real-time data on air quality and environmental risks across the property.
This guide provides all the necessary steps for installing the Halo Smart Sensor, ensuring a smooth, efficient process that enhances building safety and operational efficiency. Would you like me to help you format this for your website or any other platform?