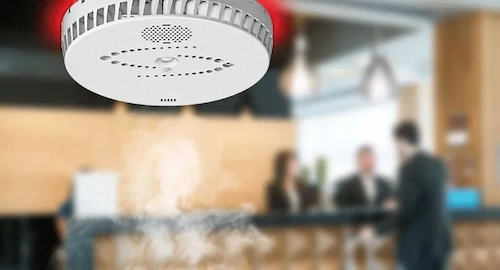
Tips to Clean Your HALO Smart Sensor

We understand the importance of maintaining cutting-edge technology for accurate monitoring and security. The HALO Smart Sensor is an advanced device designed to enhance indoor air quality, detect potential threats, and improve overall safety in various environments.
However, to ensure that the HALO Smart Sensor continues to function effectively, routine maintenance and cleaning are essential. Proper upkeep prevents sensor obstructions, dust accumulation, and inaccurate readings. In this guide, we will cover the best tips to clean your HALO Smart Sensor without compromising its efficiency or longevity.
Why Cleaning Your HALO Smart Sensor is Important
The HALO Smart Sensor is equipped with multiple sensors to detect air quality, temperature fluctuations, smoke, vaping, sound abnormalities, and other environmental factors.
Over time, dust, dirt, and debris can accumulate on the sensor’s surface, leading to false readings, sensor malfunctions, or reduced sensitivity. Regular cleaning helps:
1.Maintain sensor accuracy for precise monitoring
2.Extend the lifespan of the device
3.Prevent false alerts caused by dust or obstructions
4.Ensure optimal indoor air quality monitoring
5.Improve overall system efficiency and reliability
By following the proper cleaning techniques, users can keep their HALO Smart Sensor in top condition without damaging its delicate components.
Tools and Materials Needed for Cleaning
Before cleaning the HALO Smart Sensor, gather the following materials to ensure safe and effective maintenance:
- Microfiber cloth – Soft and non-abrasive to prevent scratching
- Compressed air canister – Helps remove dust from vents and crevices
- Isopropyl alcohol (70% or higher) – A disinfectant that removes dirt and bacteria
- Cotton swabs – Useful for cleaning small or hard-to-reach areas
- Soft-bristled brush – Helps remove stubborn dust particles
- Gloves (optional) – Prevents fingerprints and smudges on the device
Using the correct materials ensures that the sensor remains undamaged while being thoroughly cleaned.
Step-by-Step Cleaning Guide
1.Power Off and Unplug the Device
Before starting the cleaning process, ensure the HALO Smart Sensor is turned off and unplugged from the power source. This step prevents electrical hazards and accidental damage to the device while handling it.
2.Remove Surface Dust with a Microfiber Cloth
Gently wipe the exterior of the sensor with a microfiber cloth to remove surface dust and debris. Avoid using paper towels or rough materials, as they can scratch the surface of the device.
3.Use Compressed Air for Vents and Openings
Hold the canister of compressed air a few inches away from the sensor’s vents and openings, then spray short bursts to dislodge dust and debris. Do not hold the canister too close, as excessive force can damage internal components.
4.Clean Hard-to-Reach Areas with a Soft Brush or Cotton Swab
For areas that are difficult to clean with a cloth or compressed air, use a soft-bristled brush or cotton swab to gently remove dust. Be cautious around sensitive components to prevent damage.
5.Disinfect with Isopropyl Alcohol
Dampen a microfiber cloth or cotton swab with isopropyl alcohol (70% or higher) and carefully wipe down the surface of the sensor. Avoid saturating the cloth to prevent excess liquid from seeping into the device. Alcohol helps eliminate bacteria and removes stubborn grime without leaving residue.
6.Allow the Device to Dry Completely
Before plugging the sensor back in, allow it to air dry for a few minutes. Ensuring the device is completely dry prevents electrical damage or malfunctions when powered on.
7.Reinstall and Test the Sensor
Once the sensor is clean and dry, plug it back in and turn it on. Conduct a system test to verify that the device is functioning properly. Check for accurate readings and ensure there are no error messages.
Additional Maintenance Tips
To keep the HALO Smart Sensor in optimal condition, consider the following maintenance recommendations:
- Clean the sensor every 2-3 months, or more frequently if located in a dusty or high-traffic environment.
- Avoid using harsh chemicals such as ammonia-based cleaners, bleach, or abrasive materials that can damage the sensor’s sensitive components.
- Keep the surrounding area clean to minimize dust accumulation and reduce the need for frequent cleaning.
- Regularly check for software updates to ensure the device runs efficiently with the latest features and security patches.
- Monitor sensor performance to detect any unusual readings that may indicate maintenance is needed.
Common Mistakes to Avoid When Cleaning
When cleaning the HALO Smart Sensor, avoid these common mistakes to prevent damage:
- Using excessive moisture – Too much liquid can seep into the sensor and cause internal damage.
- Applying direct pressure – Pressing too hard on the sensor’s surface can lead to malfunctions.
- Ignoring the vents – Dust accumulation in vents can obstruct airflow and reduce efficiency.
- Skipping routine maintenance – Infrequent cleaning can lead to decreased performance over time.
- Using rough or abrasive materials – Items like paper towels or rough sponges can scratch the sensor’s surface, impacting its performance.
- Not allowing the device to dry completely – Powering the sensor on while it is still damp may result in electrical damage.
By following proper cleaning techniques and avoiding these mistakes, users can ensure the longevity and accuracy of their HALO Smart Sensor.
